Because of its affordability, adaptability, and durability, PVC flooring has grown in popularity in modern interior design. PVC flooring can be a fashionable and durable option for both residential and business renovations. To assist you in achieving a polished outcome, this guide will take you through every stage of the installation process. You may confidently and accurately install your PVC Flooring by following these instructions from pvcfloorings.ae.
About PVC Floorings
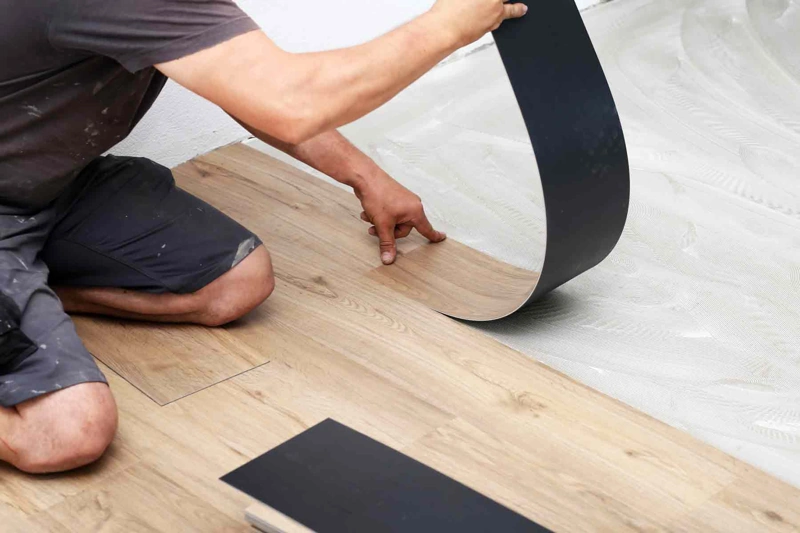
A Step-by-Step Guide to Installing PVC Flooring
Our Goal
1. Gather Your Materials and Tools
This is essential to have all required equipment and supplies available before starting any installation. Time will be saved and a flawless installation will result from preparation.
Equipment & Supplies Required:
- PVC tiles or planks for flooring
- Tape measure
- Vinyl cutting or utility knife
- Straightedge ruler and pencil
- Adhesive, if necessary
- Weighted tool or roller
- Compound leveling (optional)
- Broom or vacuum
- Safety equipment (goggles, knee pads, and gloves)
- Expandable gap spacers
2. Prepare the Subfloor
The present condition of the subfloor will have a significant impact on the standard of your installation. A well-prepared subfloor guarantees the most effective bonding and extended lifespan of your PVC flooring.
Steps to Prepare the Subfloor:
- Clean Completely: To begin, completely vacuum the subfloor to get rid of any dust, debris, or oil. To guarantee a smooth surface and remove dirt, use a broom or vacuum.
- Verify equality: Check the subfloor’s levelness with a level. While low regions need to be filled with a flattening compound, any bumps or high locations should be sanded down.
- Dry the Surface: Verify the subfloor’s total dryness. Over time, moisture can cause problems like bubbling or peeling and affect the effectiveness of adhesives.
- Fix Cracks: To stop the flooring from moving or producing problems later, seal any gaps or cracks in the subfloor.
3. Adjust the PVC Flooring
Before being installed, PVC flooring must adjust to the conditions of the space. By taking this step, future expansion or contraction-related issues are avoided.
Adjusting Process:
- For 24 to 48 hours, leave the PVC tiles or planks in the space where they will be put.
- Throughout the adjustment period, make sure the room temperature remains between 18°C and 30°C.
- Avoid putting the planks or tiles next to windows or other sources of direct heat. Instead, put them flat.
4. Plan Your Layout
Planning your PVC flooring pattern will help you minimize waste and create a visually harmonious appearance.
Tips for Planning Your Layout:
- Measure the Room’s Dimensions: To calculate how many planks or tiles are required, measure the room’s length and width using a measuring tape.
- Make Your Look Balanced: To test the fit, dry-lay a few rows of tiles or boards. To avoid making little cuts along the walls, change your starting position as necessary.
- Stagger the Seams: When arranging planks, make sure that the seams are at least between six and eight inches apart. This will give the flooring more stability in addition to giving it a more organic appearance.
- Guidelines for Marks: To keep your rows straight, mark out guidelines on the flooring with a pencil and straightedge.
5. Cut the PVC Flooring to Size
For a clean and accurate installation, the PVC flooring must be cut to the right size for your area.
Cutting Techniques:
- Mark Your Cuts Clearly: Mark the necessary cutting locations with a pencil and a straightedge ruler. Verify your measurements one more time before cutting.
- Make Use of the Proper Tool: For straight cuts, use a vinyl cutter or a utility knife.
- Cut Carefully and Slowly: To prevent sharp edges, cut with uniform pressure.

6. Apply Adhesive (If Required)
Not all PVC flooring needs to be stuck to. While some are made to be set without glue, others include a self-adhesive backing. But if the PVC flooring of your choice needs glue, take these actions:
Adhesive Application Steps:
- Choose the Right Adhesive
- Spread Evenly
- Wait for Tackiness
7. Install the PVC Flooring
You can start putting the PVC flooring as soon as your subfloor is ready and any necessary adhesive has been placed.
Installation Process:
- Start in a Corner: Start in a corner of the room and proceed outward from there.
- Press and Align: Press each component forcefully into position after carefully aligning them. To eliminate any air bubbles and guarantee a strong binding, apply pressure to each board or tile using a roller or weighted instrument.
- Proceed to the Following Rows: Begin placing every row with varied seams for the planks. To achieve smooth joins, make sure tiles are well aligned.
- Utilize Spacers to Fill in Expansion Gaps: To create a 5–10 mm expansion gap put spacers between the wall and flooring edges.
8. Trim and Fit Edges and Corners
After the flooring’s primary structure is installed, concentrate on fitting and trimming the pieces around the room’s corners and obstructions.
Tips for Fitting Edges:
- Measure Carefully
- Cut and Fit Around Obstacles
- Place Edge Pieces
9. Seal the Flooring (Optional)
Although sealing is not required, sealing the flooring can improve its adaptability to wear and moisture.
Sealing Steps:
- Choose a Suitable Sealer
- Apply Evenly
- Allow to Dry
10. Final Inspection and Cleanup
Make a last check and clean up the space once all of the flooring has been laid and secured.
Inspection Checklist:
- Check for Gaps and Bubbles
- Clean the Surface
- Remove Spacers
- Allow to Settle
Conclusion
PVC flooring installation may be a satisfying and doable task for both beginner and professional installers. You can produce a professional-quality finish that will improve the appearance and use of your area by following this detailed approach from pvcfloorings.ae. Your new PVC flooring will offer long-lasting beauty and durability with careful planning, execution, and care for detail.

6 Benefits Of Treating Your Home Windows With Smart Blinds And Shades
6 Benefits Of Treating Your Home Windows With Smart Blinds And Shades
6 Benefits Of Treating Your Home Windows With Smart Blinds And Shades
6 Benefits Of Treating Your Home Windows With Smart Blinds And Shades